Occasionally on startup the Arc View Java open project icon is missing or the toolbar is missing altogether.
Just close the program down and restart it.
Report other problems and issues as they appear.
Occasionally on startup the Arc View Java open project icon is missing or the toolbar is missing altogether.
Just close the program down and restart it.
Report other problems and issues as they appear.
So you need a basic map to take on a site visit?
If you need an Ordnance Survey Map, you can use the mapping facility to get a detailed map at the following scales
While Arc Explorer Java is really good for viewing and exploring data, it is very poor for printing.
Map Maker on the other hand will ensure good quality prints.
Load up the All Maps project and zoom into the area you wish to print, Map Maker should automatically pick the map at a scale suitable for showing on screen.
Adjust your view and simply FILE > PRINT
Quick Print is just that, remember only to set the orientation of your map. Limitation: there is no preview and the OS licence number will be missing.
Scaled Print opens up options to use borders, select a variety of output sizes up to A0, use a pre-made template, and also preview your artful creation.
Options:
TROUBLESHOOTING
You pressed print and nothing happened? Check you sent it to the correct printer or set your default printer.
You want the relevant OS key to print out as a legend? It can be done, but that’s another article.
Layer Properties exposes powerful features of Arc Explorer.
From here you can:
When experimenting with changes always use the APPLY button first, especially if you are changing scale appearance/disappearance
GIS programmes all work with layers – essentially sheets of tracing paper holding different information.
Layer management is done through the left hand pane.
Layers contain different types of information, more of which later.
If the layer pane is too narrow, widen it now.
For now you just need to know that layers can be :
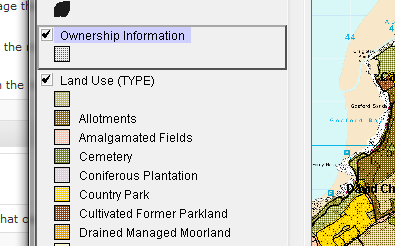
To make a layer “active” make sure it is ticked and also selected.
Try changing some stuff now and see it appear/disappear from view.
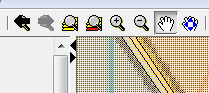
Navigation
Learn this in this order:
Right click to select zoom or pan, left click to select, and always switch this way – saves you sweeping the mouse across the big screen.
Prefer keyboard shortcuts? Arrow keys pan and ctrl up / down zooms.
 Now you’ll see that there are options in the top menu too. Hover over each to see what it does.
In order:
Try zooming in and out, activating layers, zooming in to different extents. The last Pan tool seems pretty pointless, but no doubt serves some purpose.
![]() Start Arc Explorer – you cannot miss the badly drawn icon – we’ve emphasised it by doubling the size (now what is that yellow scribble?)
Start Arc Explorer – you cannot miss the badly drawn icon – we’ve emphasised it by doubling the size (now what is that yellow scribble?)
The windows interface is old-school, but it works well for viewing and initial exploration and really quick to get to grips with. You won’t need to understand GIS inside out to do some pretty cool things, and if you are completely new to GIS you’ll pick the basics fast.
Here is what ESRI have to say “ArcExplorer offers tools for viewing and querying your spatial and attribute data; performing spatial analysis tasks, such as selecting and buffering features; creating a variety of maps, such as unique symbols and graduated symbols; and much more. You’ll be amazed at the ease with which you can take advantage of these tools.”
Click the open folder icon and navigate to the desktop (in the left hand pane.)
Now click Public – Map Store and then Map Projects, which is where our ready-made map projects sit.
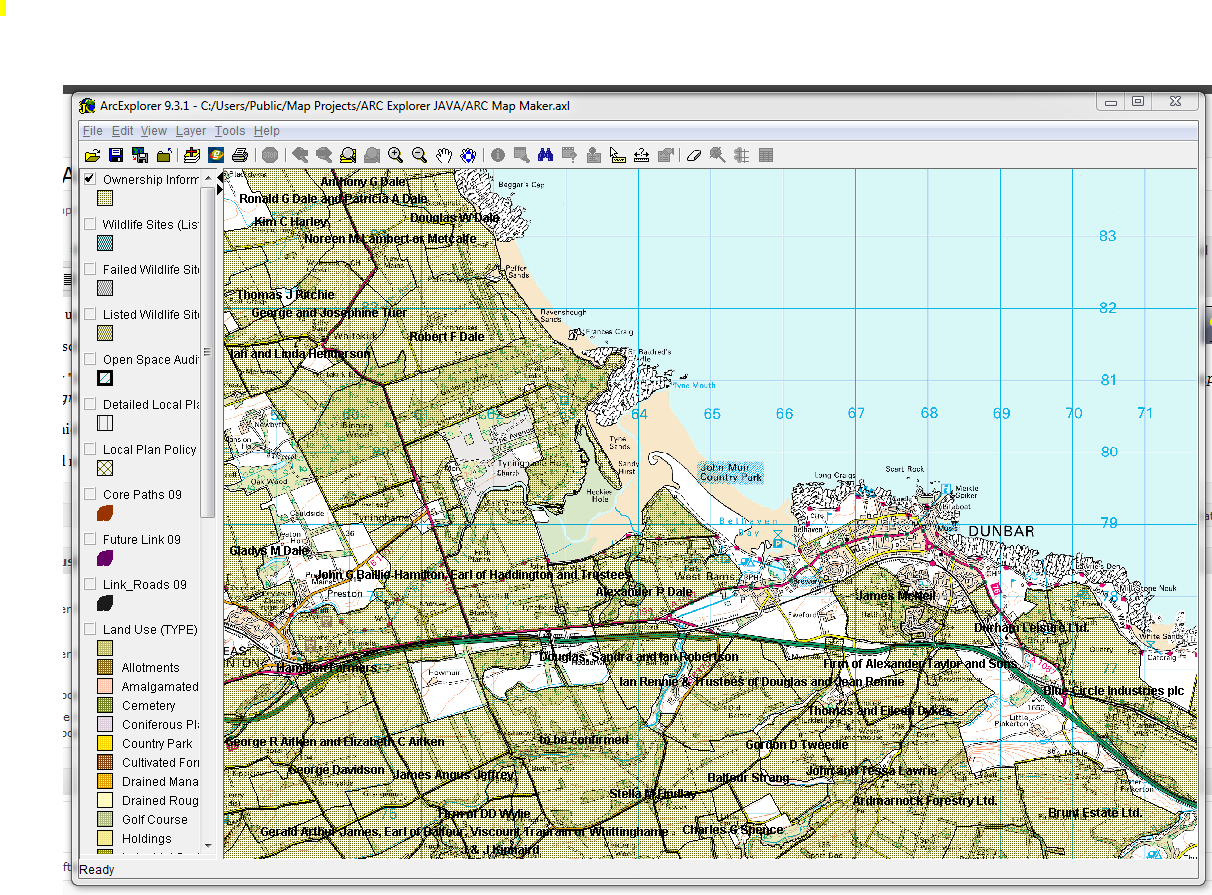
Since we are using Arc Explorer, click on the ARC Explorer JAVA folder and select ARC Map Maker.axl (note the extension that is used only for Arc Explorer projects.)
Tada … we have some ready made map data to look at.
Next we will look at ARC Layers and Navigation.