There are 2 basic ways to display a key. As an overlay on your map, or in the margin of a printed map. The second is more involved and will be dealt with later. Here are the steps to adding an overlay:
Create Woodland Furniture
Right click to get the Context Menu and select Map Furniture
Now click and drag a small box somewhere on the screen to hold your legend.
The Map Furniture dialog box will show. Select Project Legend.
Chose the Panel Style tab and select Opaque as the Transparency of background
Chose a Border Style and click OK
To edit your legend Right Click on it.
To move it click and drag it. To adjust the size hover over the corner and click and drag when the stretch box icon shows.
Now repeat the process to give your project a title.
Map Maker doesn’t make keys automatically, and the automation tools that do exist take a bit of time to learn and to tune well. Map Maker is orientated to making maps from the ground up. This can be an advantage when analysing third part data at a large scale (a small area). A legend for a small area map doesn’t require a full blown key, which takes up space and hinders the interpretation of a map.
So it is back to the Project Manager.
Create Woodland Legend
Click Project Legend. It should be empty.
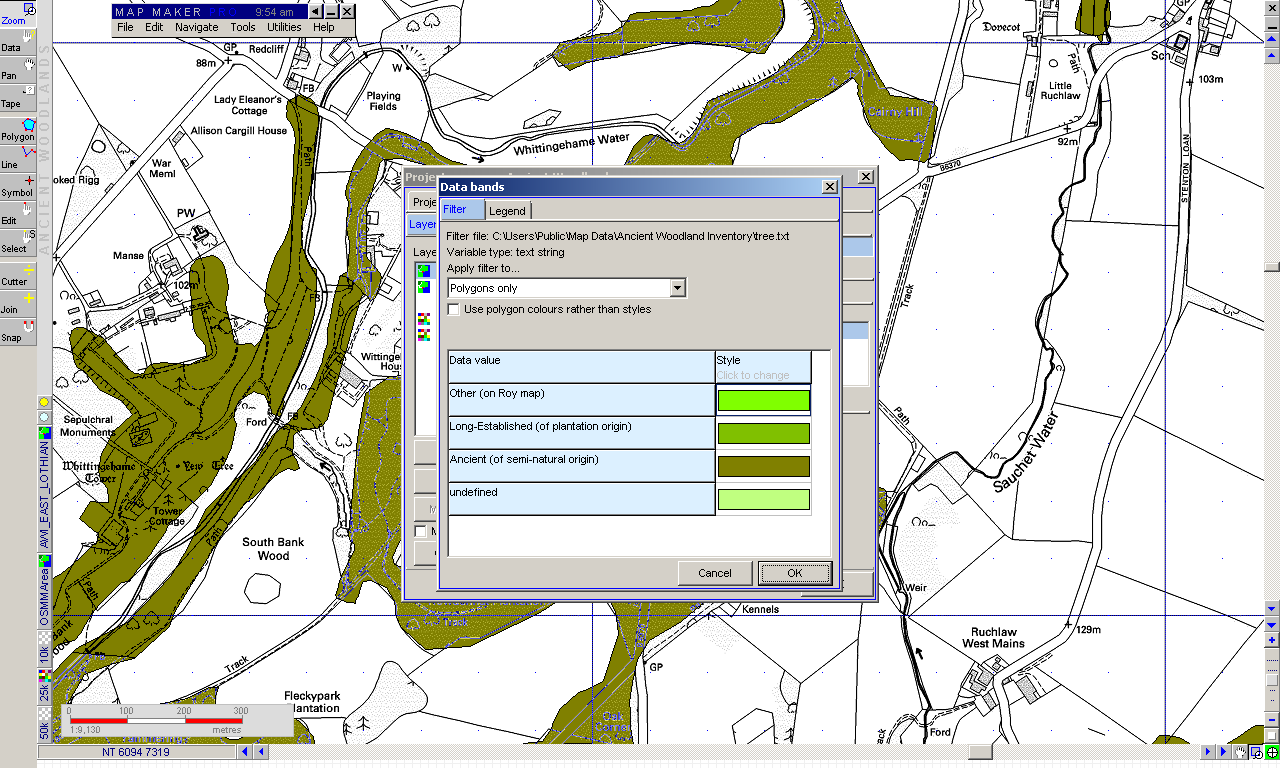
Select in succession 4 new polygon items. They’ll appear all the same at first, this is normal.
Click on the colour and chose, sequentially our 4 key colours.
Click on the Text to modify it, if necessary.
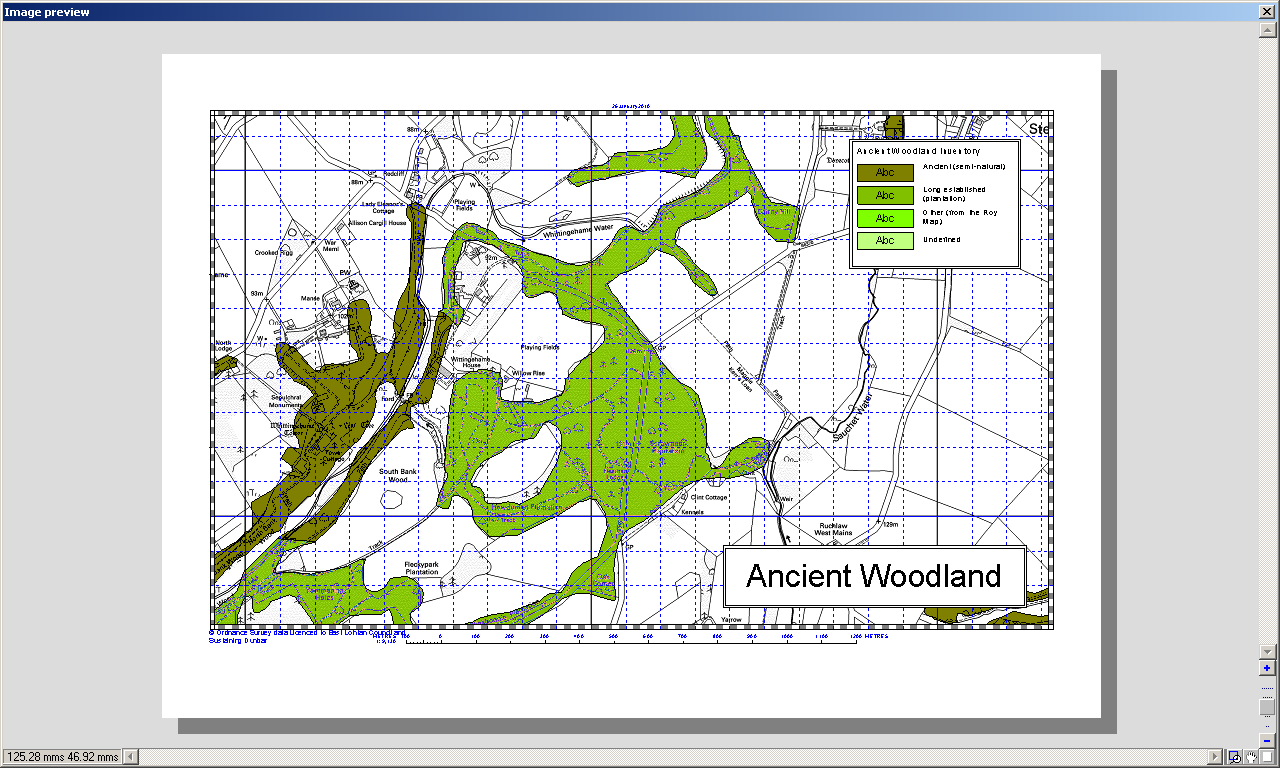
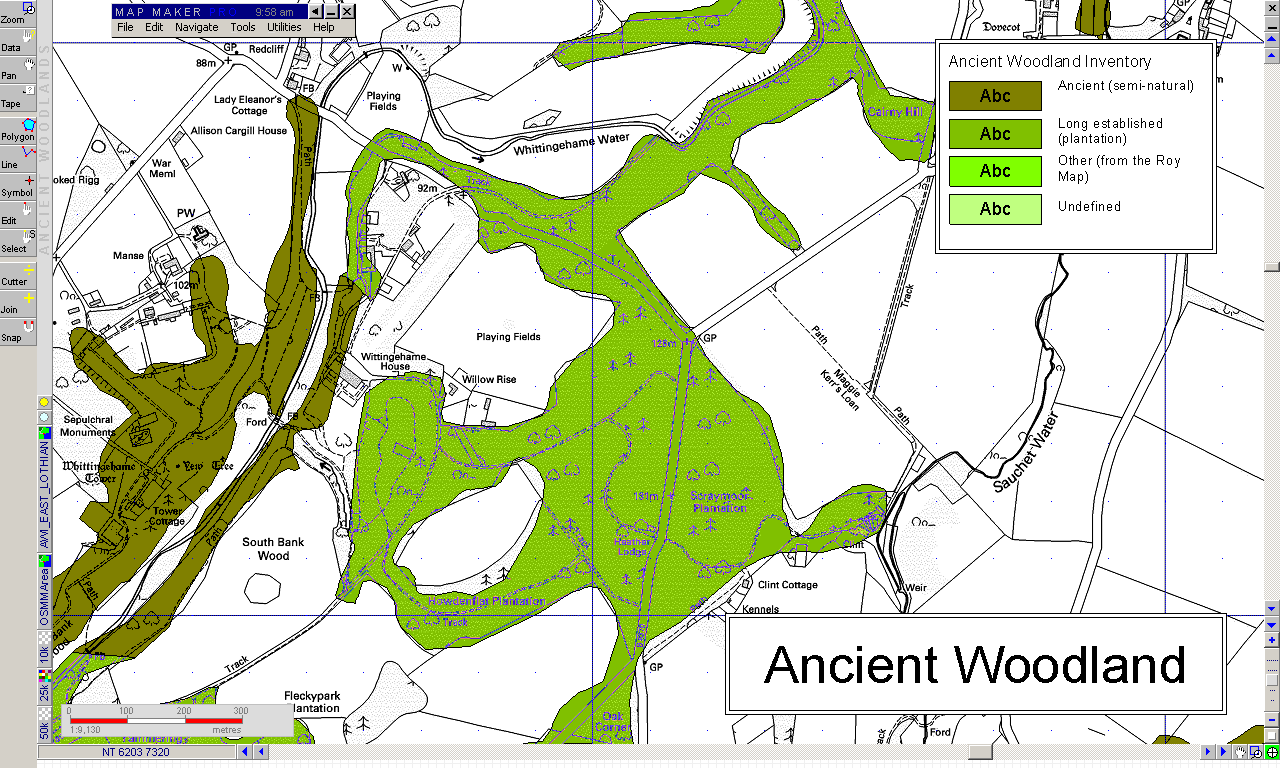
Click on the Title tab and name it “Ancient Woodland Inventory”, then preview your new Legend.
Exercise 1.5: Remove the labels and change the style
By default, the new layer (AWI_EAST_LOTHIAN) uses the Project Style Set to colour the Polygons. This can have unpredictable results – strange colour schemes and labels, but no harm is done as we are going to change it in the next step.
Managing styles is the subject of a full tutorial on its own, but to get you going here is how.
Remove Woodland Inventory Label
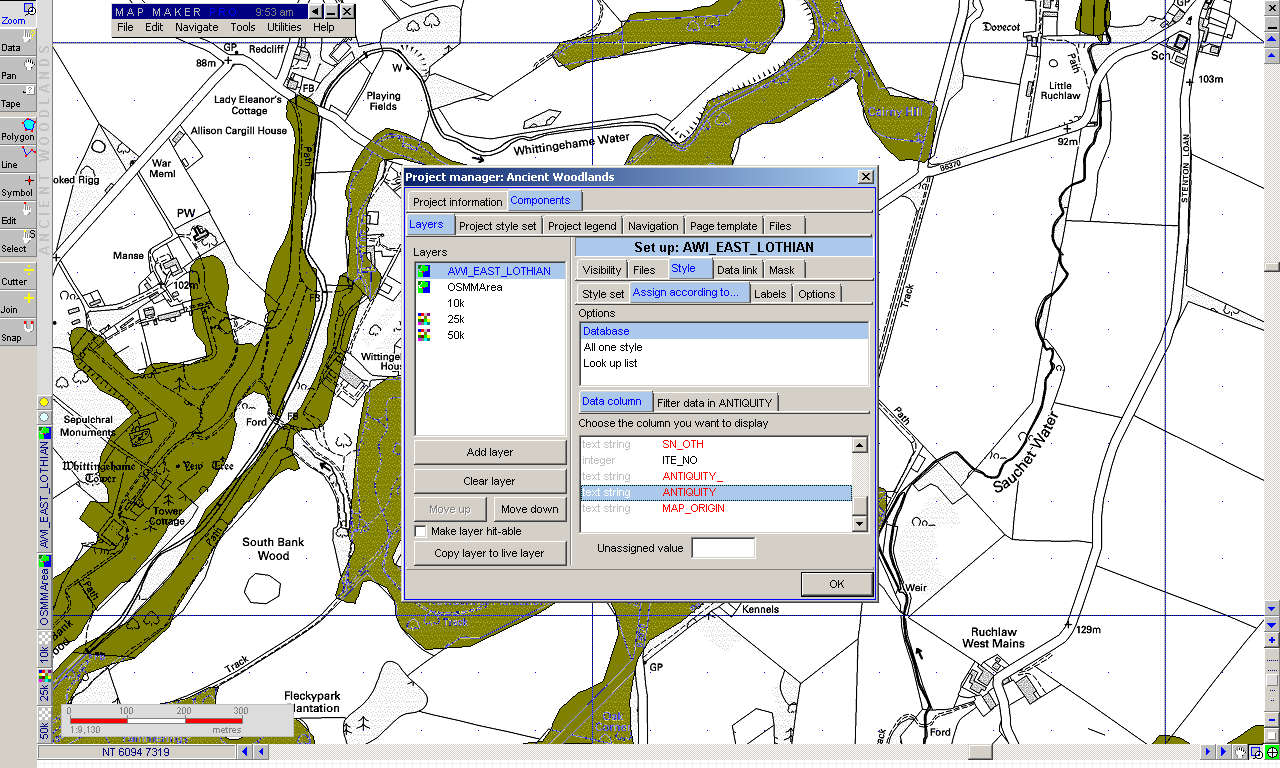
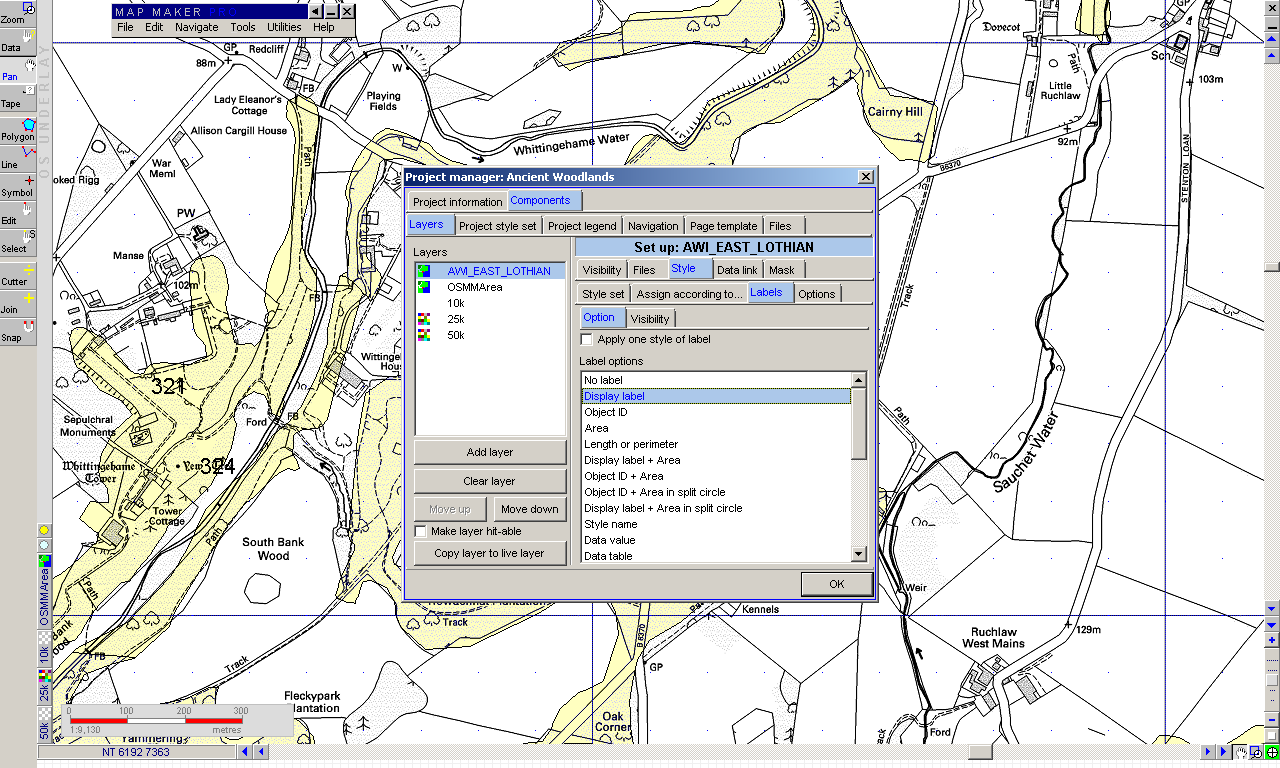
Call up the Project Manager. The right hand pane has a range of configuration options set out as tabs.
Chose the Labels sub-tab and select No Label and then OK.
If you are feeling adventurous, come back to this stage after you’ve completed all the exercises and see if you can chose a different display label from the database (Hint select Data Values).
Next we are going to change the default project style. Creating a fresh one takes time, so we are going to use one we made earlier.
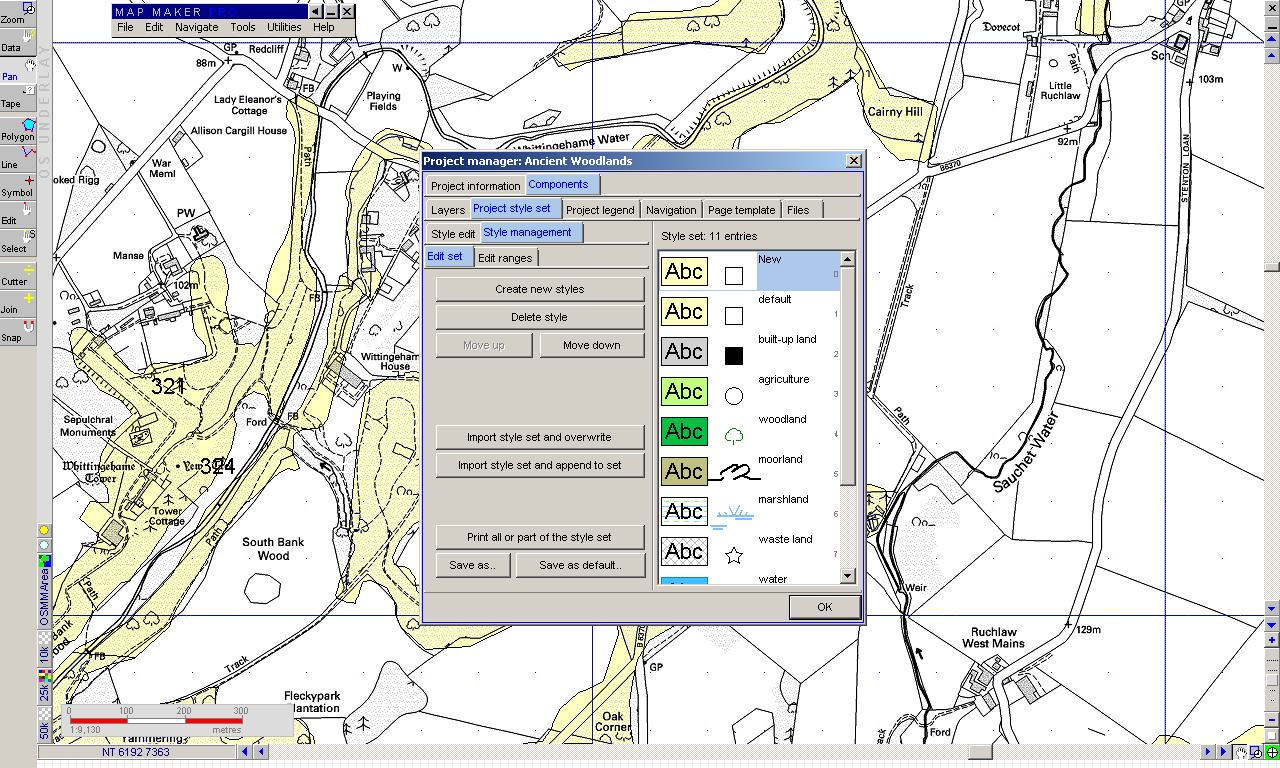
From the Project Manager, select the tab after Layers called Project Style Set
Now click the sub tab Style Management and select Import style set and overwrite
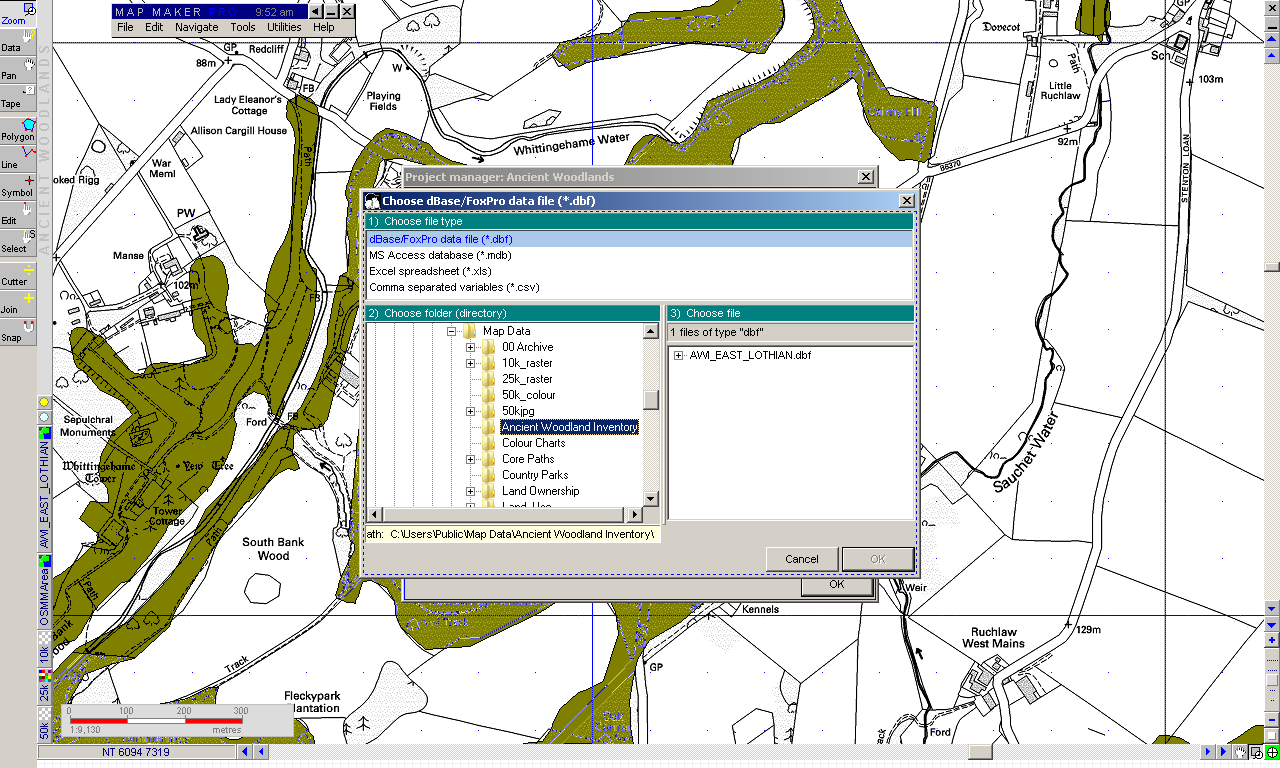
Navigate to the folder Ancient Woodland Inventory, where we picked up the original data, and select the style file and click OK
Click OK
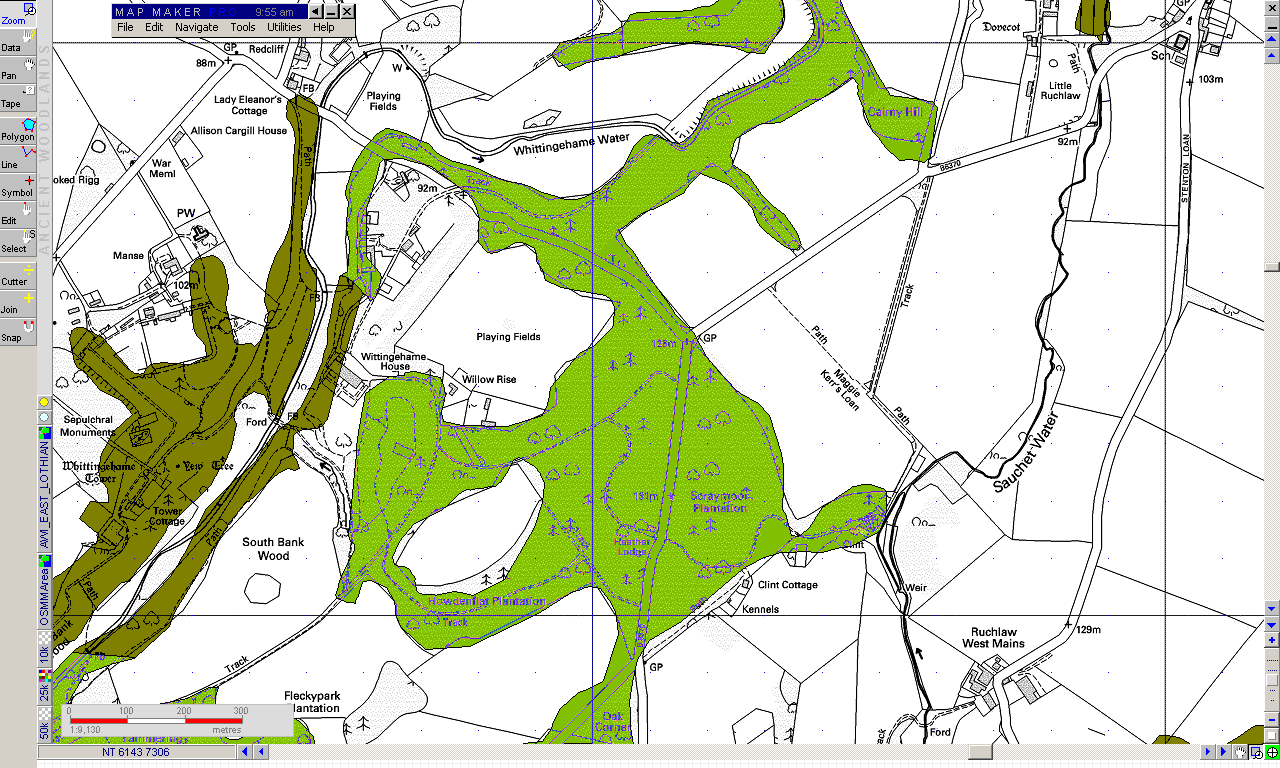
Note that the map has now changed, but we still haven’t told it how to apply our new colour scheme.