All Articles

Labelling and Text Basics

Change the Label Attribute

There are 2 main sorts of labels and these are different from the so-called map furniture mentioned earlier (Titles and legends etc):

  1. the label attribute associated with an object and
  2. free standing objects or labels in their own right.

A further label type, the marker, is a temporary aid that can be useful during the drawing process.

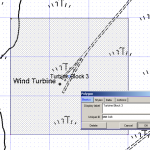
The attribute label associated with an object is accessed via a single click (CTRL+E and select the object). The properties of the object are called up where you make changes to any of the properties of the object. Click the basics tab, if this is not your default, and rename your object. Remember that this label is only shown if the layer in question is set to show labels. You can select a different style for the label or create your own style in the Styles tab.
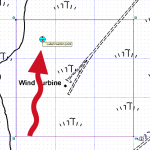
Label Insertion Point

If you want to move the position of the object label, you must go into Edit mode (CTRL+E). Double click the object and the label insertion point should be highlighted clearly in the middle of the object. You can pick it up, alter the angle of the text and adjust the justification. It is a bit fiddly at first, but persist because it works quite well.  When you are done simply click off the object. You can perform all the other edit operations, like rotate, move and stretch at the same time.

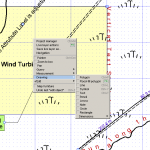
Other annotations are done via the Draw options, in the context menu – we’ll deal with symbols separately.  We have:

  1. Text
  2. Arrow
  3. Dimensions
  4. Note

Adding Labellings
Adding Labellings

Text objects are essentially vector objects, with a beginning and end used for on-map annotations.  You can obviously set a text style and you can alter the text height (in metres!) and the justification, which opens up neat options such as stretching the text between the to end points or following an S or other shaped curve.

Arrows allow you to label a complex object with ease. Both Text and Arrows can be edited and moved just like other objects. Arrows and text will be rendered in print and on screen.

Dimensions are handy because they automatically measure the distance between points and then render the measurement on the screen and a printed map.  Dimensions, like text, can be styled.

Notes are a different sort of label, and although are very versatile are only of use to the map maker as the Notes are not visible on the printed or otherwise published map.  Notes can be anything from a text document to an image or a web page.

Finally Markers: use these only to set out temporary points that you want to join up during a drawing session.  You can edit labels, and join them up or delete  via the Actions tab.  To add marker place the cursor on your map and click M.  To edit a marker and access the Actions tab:  CTRL+E and click on the marker’s base.
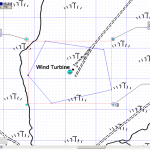
Editing lines and polygons basics

Edit Map Maker Object

You’ve created some lines or polygons and now you need to correct them.

(If you’ve saved your data, you will have to first reload it into the Live Layer.)

There are three dimensions to think about: selecting objects, editing objects, and editing attributes.

Selecting objects is an option from the Context Menu, under Edit or just click on the left hand toolbar button.

There are 2 tools the Select tool and the Edit tool.  The Select tool is quite powerful and handy for quick deletes and a host of other operations.  Selection options include

  1. select a single object
  2. drag a square net
  3. hold down SHIFT key to select several objects (and perform operations)
  4. hold down CONTROL key and draw around a selection
  5. hold down C key and draw a circle around a number of objects

Operations that you may perform include:

  1. copy the selection
  2. cut selection (for use in a new project)
  3. delete the selection
  4. save the selection

The selection manager can be invoked from the Edit Menu and provides a wide range of additional options, which will be described later.

Editing object options are available from the left hand toolbar or short-cut CTRL+E takes you to edit object.  Double click the object.

The main Edit options are described below:

  1. drag the blue circle rotates the object
  2. the blue squares stretch the object
  3. the blue diamond to move the object

also

  1. the info button calls up the object parameters
  2. the blue label locator justifies, rotates and sizes the label, if shown
  3. the red vertices can be added to or deleted (click and drag;  select delete)
  4. the corder vertices are important in rotation

But you can also change the shape of the polygon by selecting a vertex and dragging it, delete a vertex by hovering over it, create a vertex by clicking  on a line.

To complete your edits click somewhere outside of the edit area and you are done.

Editing object attributes is a single click away if you are in Edit mode.  If not, click CTRL+E and single click the object whose attributes you wish to edit.

Delete file failed

Delete file failed
Delete file failed
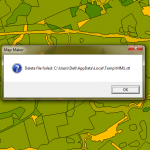
Delete file failed is a common error that appears to follow a range of other errors. Temporary files are created by Map Maker in the background. If an error occurs access to the temporary file is interrupted for some reason and this error is generated and may recur throughout a session.

Solution

Save any work you have done, including Live Layers. If you are working on Styles, make sure you export a set. Restart Map Maker.

List index out of bounds (4)

List out of bounds
List out of bounds
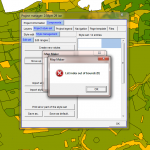
This error can occur when you are moving items up or down in the Style Manager.

Move too far and this error is generated, the number seems to represent a position that no longer exists (-1 if you are moving up the way).

If you’ve created a new style, you may find it has dissappeared. 

Continuing working may make the error recur.  Save project