All Articles

Editing basic attribute data

Data Query
Data Query

Although we’ve covered this before, it is worth dwelling on how this works in a bit more detail.

If you are editing data or creating new data, you can create basic labels as you go OR you can add or refine them later. If you want to modiy a saved layer, remember that you will have to copy it to the Live Layer.

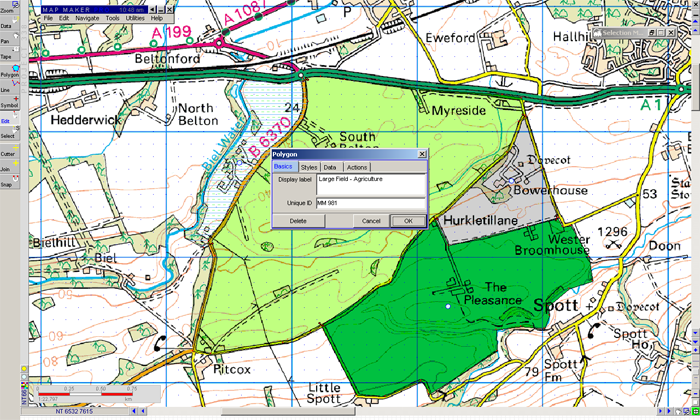
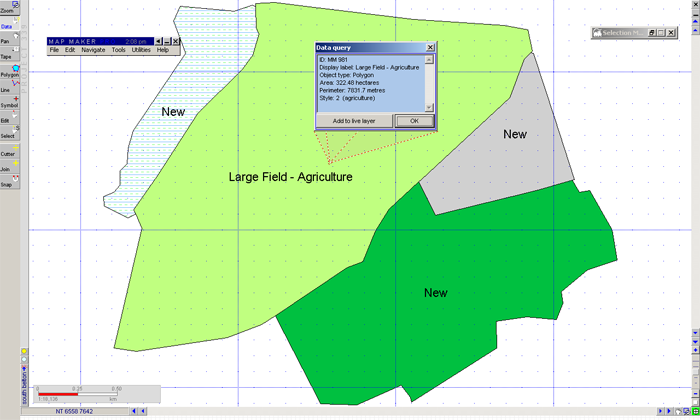
Using the simple Edit functions (the CTRL+E key combination) and clicking on the polygon or feature, selecting the Basics tab allows you to modify the polygon’s Label or modify it’s ID.

Until such time as we create an associated database, there will not be scope to add additional information in the form of attributes tour simple data.

To create a database, we use the Utilities menu to generate columns from .dra file.  The diagram shows that we can select at any number of columns to associate from the .dra file – except the ID is the only obligatory one.  At this point, there is no link to the database, we have simply created a database based on the .dra file, which can be different from the one displayed on screen.  The database is saved as a .dbf file and can be read by a number of spreadsheet programs.

Create Database
Create Database

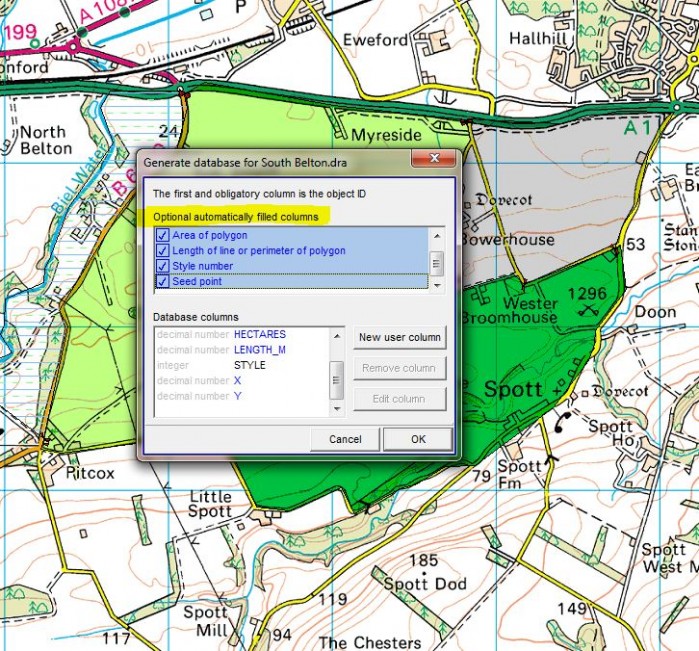
So the next job is to link the database to the .dra file and save this all as a project.

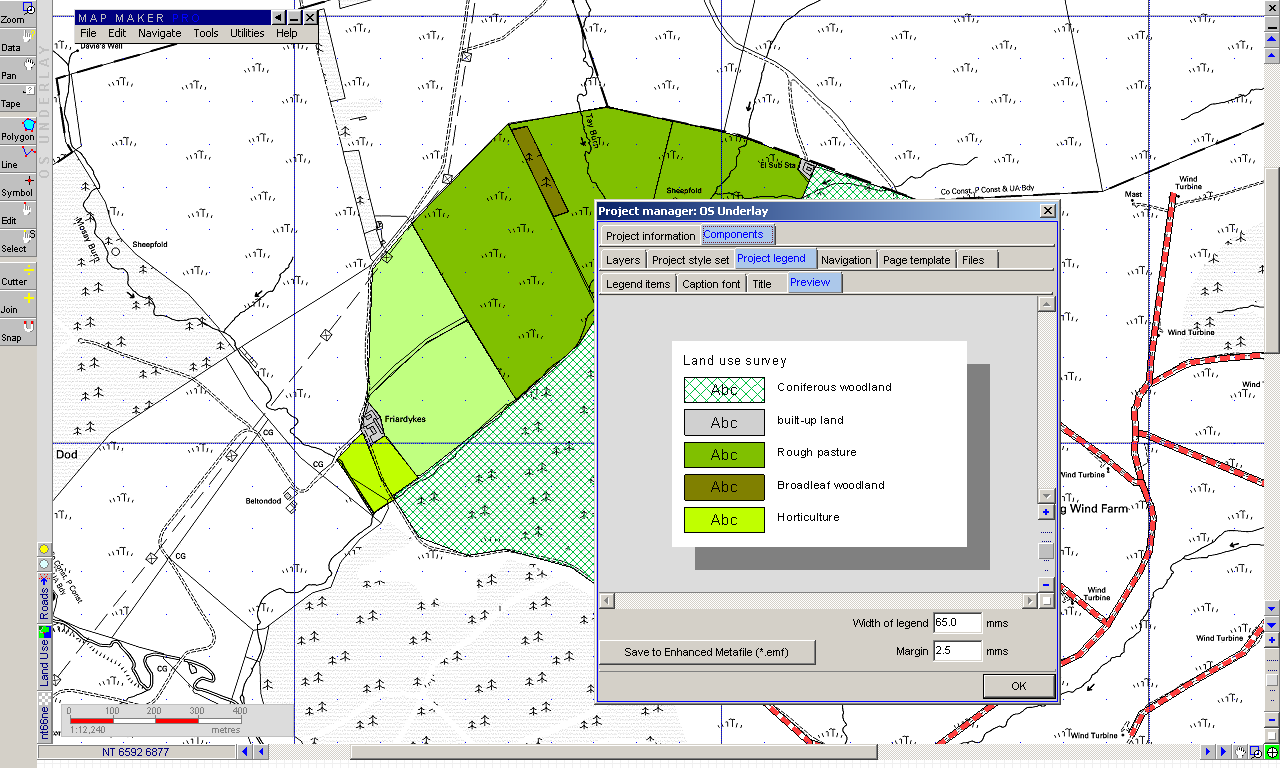
The linking is performed through the project manager.  The link tab is next to the style tab.  Simply choose the database you’ve just created.

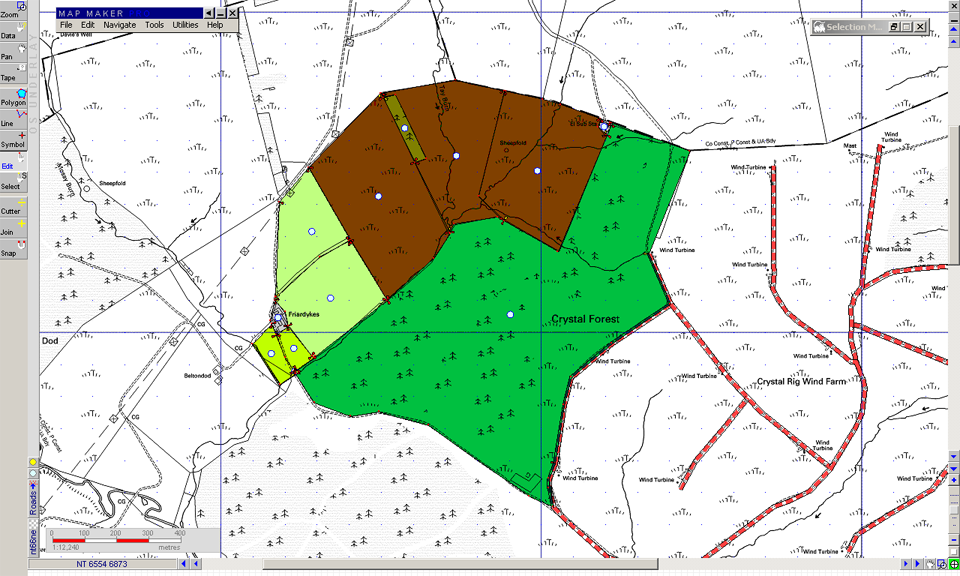
Now, when we go to edit a polygon (in Live Layer), you’ll see that a new Data tab appears alongside the Basics, Style and Actions, which has automatically created a number of fields, provided you selected them.

When you save your .dra file, you should also be prompted to save the database file.  It is usually safe to overwrite the existing one, unless you have performed a large number of changes.  If you experience any issues you should save everything (.dra and .dbf) with a new name.

Creating a database

Basic Polygon Attributes

Up to now we’ve confined ourselves to working with third party data or creating and printing simple polygon or line drawings.

Map making comes into its own when using databases.  When using a third party data set we found that we could style a map according to different columns in the database.

In the next set of lessons we are going to learn about how to work with databases and create and edit a new database.

Databases are regarded as Advanced.

The database simply holds pieces of data in rows and columns, like an excel spreadsheet. These data are not normally graphical nor spatial but describe your data set. They are often known as attributes and can be linked to a feature on the map (a polygon, line or point) for display purposes or for interrogation using a query tool – or even excel. Attribute data needs to be collected systematically and correctly to be useful.

If you are working with a third party data set and NOT using the native .dra Map Maker format, ALL the information used for styling a map will be contained in a database, which you will need to link to.

HOWEVER basic attribute data – styles (numbers) and labels (text) – are handled differently in Map Maker.

If you are using Map Maker to create linework, then the style numbers and the labels are stored in the .dra file, which is created when you save a layer. The fact that you can create another database with new information for styling purposes or with specific display labels can be a bit confusing. You can even extract the information from the .dra file and then use that to build your database.

When you first digitised a line or a polygon, you had the option to enter / edit the display label. These can be left as temporary identifiers and edited later. Alternatively we can attach a database and use the data from the database for styles & labels.

Printing your map

Panel editing
Panel editing

Last time round we created a printable version of the map using Map Furniture.

An alternative exists.

  1. First we are going to change the map view window and set it to 1:25k (pan to get the road network in view)
  2. The road line style could do with changing colour, so change that first (in Project style set, change the Line style and colour)
  3. We mustn’t forget to a add a line item to the legend and re-save our legend as a wmf file (Preview & over-write the one created earlier)
  4. Now go the File menu and select Print, and click the Scaled print tab
  5. Chose the second or third panelled print option, then Edit side panel
  6. Now you can import your previously saved Legend, plus add images and text
  7. Click Preview, and if you happy Next to go to the final print screen
  8. Select a draft printer, ensure it is on, and print away

And here is what you should get …

Print landuse map
Print landuse map

    Create a legend

    Creating the legend
    Creating the legend

    You’ve created a set of styles and now you need a legend.

    Map Maker automates some tasks, but not the creation of the Legend.  Each legend is created with presentation in mind, which means that you don’t have to show all the styles you’ve created.

    The prccedure is the same as if you imported a style set (the Ancient woodlands example.)

    1. Go to the Project Manager and select Project Legend
    2. If it is not empty, then delete each item in turn.
    3. Now add 5 polygon items, one at a time
    4. They all look the same, but if you click on them you can set each one
    5. Do that for each legend item, ensuring they are in the right order
    6. Change the title in the Title tab and click Preview.
    7. Make any further changes to the Caption etc. and lastly (in Preview)
    8. Save the Legend to enhanced metafile

    We are now ready to print a map.

    Devising a style

    Land use
    Land use

    Earlier we created a map from an existing style.  Style files are created automatically for specific projects, but you only have a default style set when you start off and this can be rather limiting.  Remember also that although it is possible to recycle styles, you can mess up an earlier project should you inadvertently overwrite the project’s style set.   This is a hazard if you create styles on the go.

    We are going to modify and augment the existing project style set and save it.

    1. Go the Project Manager (SPACE BAR), Select Project Style Set
    2. Click the Style Management sub tab
    3. Scroll and select the last style in the list (this is really important!)
    4. Now Create new styles and enter 3
    5. Hit OK and this should have added 3 new labels to the bottom of our set
    6. Move your new styles up and down the list but don’t click like crazy or you’ll get a nasty error, which requires you restart Map Maker.

    If all is well you can now click on the the Style edit tab and start to colour in your new styles (bearing in mind that each style carries through to a line, symbol etc):

    1. We’ll keep it simple and add name labels and a nice colour for Broadleaf woodland, Rough pasture and Horticulture.
    2. Next you should edit the existing style label names “woodland” to read “Coniferous woodland” and “agriculture” to “Ley grassland” and capitalise built-up land.
    3. Now we are going to assign our new styles to each parcel of land. Copy the Land use layer you saved earlier back to the Live Layer.
    4. Select each parcel in turn using the EDIT option and and select the new styles!  When you are done save the Live layer.
    5. Now when you modify styles they will be automatically updated on your project.
    6. You can deploy your styles in different projects, but no need to load the old project and save as, because you can save the project .stl styles and import or append them to any project.

    If all is well, we are ready to create our project legend