All Articles

New data sets and updates

Mapping Updates

MapWindow GIS Open Source Software (New!)

Update Tatuk Viewer (much improved!)

Update Mapmaker (Now With Postcode Finder!)

ArcGis Explorer Update (Minor Improvements, incl. Bing Underlay)

OGR2OGR / FWTools (a utility to get shape files into kml and vice versa)

Updated base projects with some of the following new data sets from Ordnance Survey:

1:50 000 Scale Gazetteer – GB | Data type: Point Data | CSV

MiniScale – GB | Data type: Raster | TIFF-LZW (With or without GRid with or without relief)

OS Street View – NT | Data type: Raster | TIFF-LZW

OS VectorMap District – NT | Data type: Raster | TIFF-LZW

OS VectorMap District – NT | Data type: Vector | ESRI Shape

1:250 000 Scale Colour Raster – GB | Data type: Raster | TIFF-LZW

OS Locator – GB | Data type: Point Data | ASCII text, Colon separated

Code-Point Open – GB | Data type: Point Data | CSV (Post Code Data)

Have fun!
Creating KML files from Map Maker

We can use OGR2OGR a command line opensource programme, that converts between a wide range of different formats.

Download info is available here.  FWTools is available on Windows, Mac, Linux.

OGR can also reproject the data.

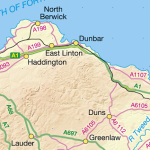
ogr2ogr -f “KML” -s_srs “EPSG:27700” -t_srs EPSG:4326 OutputFile.kml InputFile.shp

will take the UK OS and make it work on Google Maps (e.g. above) or Google Earth.

Extracting data from a database

This is done in 2 main steps.

First of all we create a a polygon extract and save this as a .dra file.

Then we employ a Utility to Extract the data from the database that it was originally associated with.

Select and save .dra

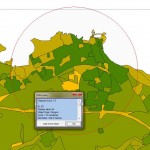
To extract polygon data you can use the query tool, except that this will require there to be an underlying database.

Make sure that you have selected the Default tab as an On-Hit option, in the data Link tab in the Project Manager.

Options for selection (CTRL Q to select – other options go to tools select Query options):

  • to create a box selection, click and drag
  • to create a circle, hold down the C key and click and drag
  • to create a linear selection, hold down the CTRL key and click and drag

Now copy to the active layer, delete anything you don’t need and then save with a memorable new file name.

Alternatively copy everything to the Live Layer and use the Selection Tool to select your polygons, as above, or use the Selection Manager to create more complex queries. “Save selection” rather than whole Live layer and continue with the second half of the process.

Make a database extract

From the Utilities menu, select under the first item Make database extract for .dra and follow the steps carefully:

  1. Select the .dra file you’ve just created
  2. Link to the old database
  3. Chose the link column (a unique id)
  4. Save to a database extract with the same name as your .dra

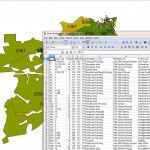
If all is well, you can now edit your .dbf file and edit or export to some other format.

Importing a database

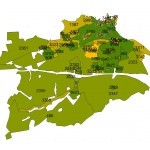
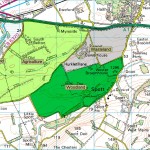
Database before
Database before: using the basic labels

Although this is not difficult, it can be headache to prepare your data.

There are a few steps:

  1. Create a database file with attribute data in Excel
  2. The first column should be named ‘ID’ corresponding to the ID in Map Maker.
  3. The database id must match ONLY one label in the .dra file (remember you can edit the .dbf file from the Project Manager Data link menu or Utilities, Edit Database).
  4. The spreadsheet can ONLY have as many rows (ex the title row) as there are mapping units (lines, polygons which are best not mixed!).
  5. Also, the ID column must be text format and any formulas converted to values.
  6. There should be no empty values (remember to use the default -99 for missing values)
  7. Save this file as an .dbf (or .xls file, though this can be problematical)
  8. When this is done, you can import into MapMaker.
  9. This is done through the Project Manager, and the layer that you wish to link to (chose .xls from the drop down).
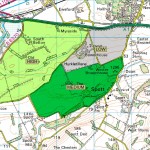
Database after
Database after: a new database has been attached and different columns show

This process is by no means simple, especially if your database and polygon files are complex and reference to the Map Maker manual is highly advisable.

Simple database query

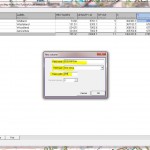
Create Database Column

Now that we have a database, certain query options become available.  Before you can query the database, with the data tool, you need to check that the database is hit-able.  To check this option, go the layer submenu and you can click make hit-able, or do the same in the database subtab in the Project Manager.

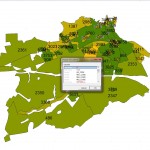
Now when you click a polygon you’ll get a simple pop up of the underlying information as it relates to the selected feature.

Also in the project manager, note the Link Column.  In most cases it will be the first column or ID.

The On Hit tab has an option to make the database Read Only, including a variety of other useful options that will be explained later.

It is possible now to edit the database in Excel, remembering only that each row MUST correspond to an id in our polygon file.  However we can add further columns, remembering here that all we need to do is to add a descriptive title.

There is an option, within Map Maker itself, to add rows and columns, provide a column heading or title, set the default format, move columns to the left or the right and rows up and down.  Advanced options are available here too.

Query Database
Query Database

You can add data on a per record basis, but remember that the built in tools can give a number errors.  Adding columns can shunt data around unpredictably, so always it carefully or preferably stick to Excel.

Now when we use the query tool, you can see the new column Description is viewable.