Although we’ve covered this before, it is worth dwelling on how this works in a bit more detail.
If you are editing data or creating new data, you can create basic labels as you go OR you can add or refine them later. If you want to modiy a saved layer, remember that you will have to copy it to the Live Layer.
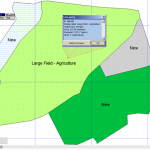
Using the simple Edit functions (the CTRL+E key combination) and clicking on the polygon or feature, selecting the Basics tab allows you to modify the polygon’s Label or modify it’s ID.
Until such time as we create an associated database, there will not be scope to add additional information in the form of attributes tour simple data.
To create a database, we use the Utilities menu to generate columns from .dra file. The diagram shows that we can select at any number of columns to associate from the .dra file – except the ID is the only obligatory one. At this point, there is no link to the database, we have simply created a database based on the .dra file, which can be different from the one displayed on screen. The database is saved as a .dbf file and can be read by a number of spreadsheet programs.

So the next job is to link the database to the .dra file and save this all as a project.
The linking is performed through the project manager. The link tab is next to the style tab. Simply choose the database you’ve just created.
Now, when we go to edit a polygon (in Live Layer), you’ll see that a new Data tab appears alongside the Basics, Style and Actions, which has automatically created a number of fields, provided you selected them.
When you save your .dra file, you should also be prompted to save the database file. It is usually safe to overwrite the existing one, unless you have performed a large number of changes. If you experience any issues you should save everything (.dra and .dbf) with a new name.